Read the full article at AskVG.com
via AskVG https://ift.tt/2UbcFTF

Local WordPress using Docker – Running a local WordPress development environment is crucial for testing themes and plugin before we push into staging or production environment. To run WordPress locally, we need to install and setup PHP, MySQL (or MariaDB) and WordPress which is not straightforward.
Docker provides an ideal way of setting up local WordPress development setup (for Windows you might prefer WAMP). Using simple docker commands we can quickly spin up a new environment where we can test WordPress themes and plugins. Assuming you already have setup Docker in your machine, starting WordPress is quite rapid.
Since we are running WordPress in Docker, the same setup will work in Window, Mac and Linux.
Let us see how to run local WordPress setup for development using Docker.
Setup Docker Compose for WordPress. Start up a command line terminal and create wp-local folder.
$ mkdir wp-local && cd wp-local $ touch docker-compose.yml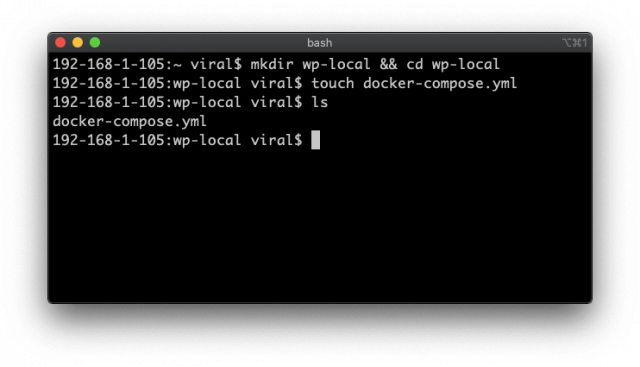
To setup WordPress + MySQL + phpMyAdmin images in the docker-compose, copy following content into it.
docker-compose.yml
version: "3" services: db: image: mysql:5.7 restart: always volumes: - db_data:/var/lib/mysql environment: MYSQL_ROOT_PASSWORD: password MYSQL_DATABASE: wordpress MYSQL_USER: wordpress MYSQL_PASSWORD: wordpress networks: - wp wordpress: depends_on: - db image: wordpress restart: always volumes: - ./:/var/www/html/wp-content environment: WORDPRESS_DB_HOST: db:3306 WORDPRESS_DB_USER: wordpress WORDPRESS_DB_PASSWORD: wordpress ports: - 80:80 - 443:443 networks: - wp phpmyadmin: depends_on: - db image: phpmyadmin/phpmyadmin ports: - 8080:80 environment: PMA_HOST: db MYSQL_ROOT_PASSWORD: password networks: - wp networks: wp: volumes: db_data:In above docker-compose.yml file we are creating 3 containers; mysql, wordpress and phpmyadmin. The wordpress container exposing the wordpress at port 80. Similarly phpmyadmin is exposed at port 8080. Both wordpress and phpmyadmin depends on the db container which runs MySQL image.
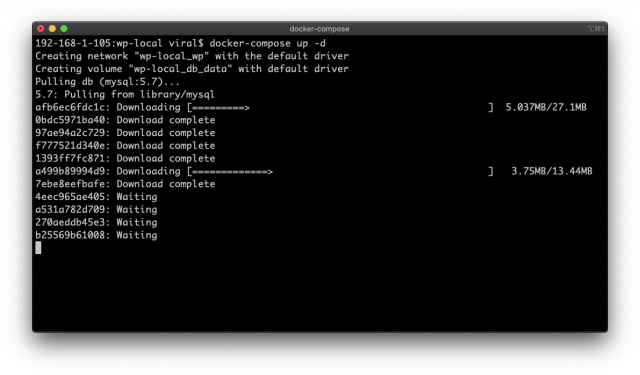
Save the docker-compose.yml file and run docker-compose up command to create and start the docker containers with WordPress, MySQL and phpMyAdmin.
$ docker-compose up -dWhen running first time, Docker will build up the stack and download all the images. Hence it might take a while. However subsequent invocation is going to be instant.
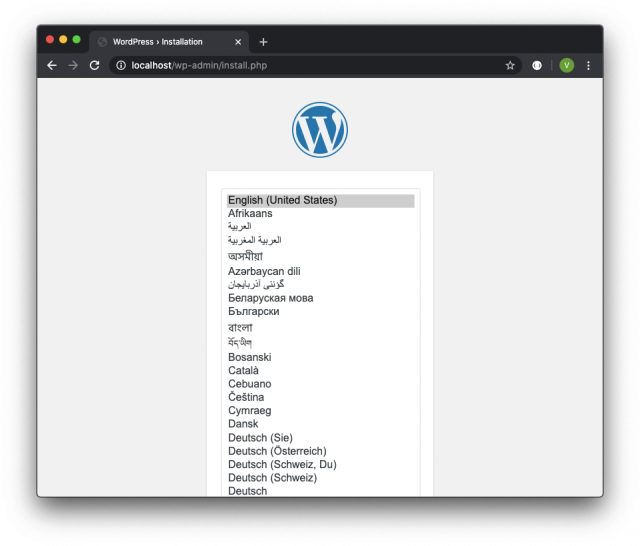
Once the docker-compose is completed, open up the browser and goto http://localhost
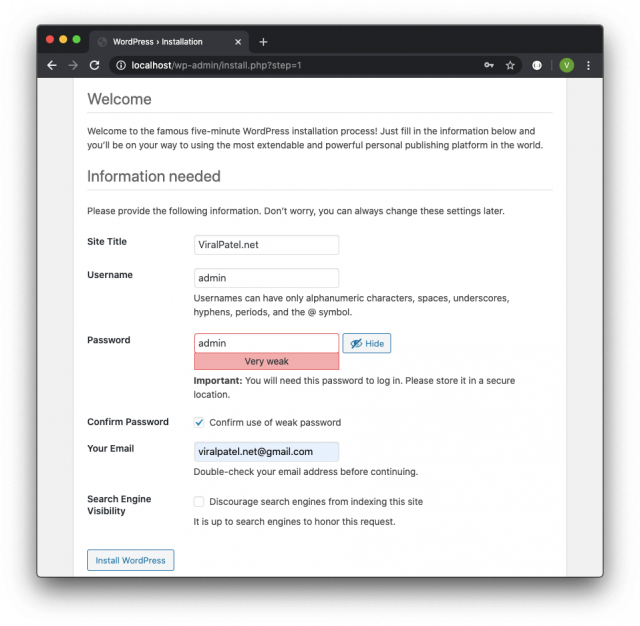
We can start the local wordpress setup. Enter Site Title, Username and Password and press Install WordPress.
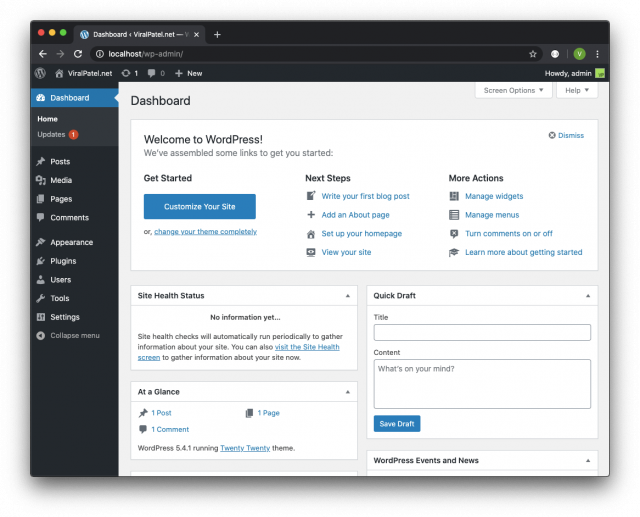
Once WordPress setup is completed, login using the username/password provided in previous step and you will be greeted with WordPress Dashboard.
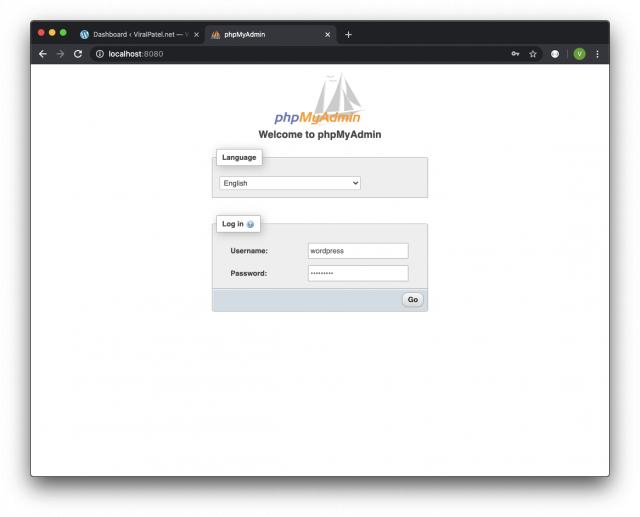
Since we also setup phpMyAdmin in our Docker compose file, login to phpMyAdmin to view/update WordPress database.
The username/password for phpMyAdmin is the value of WORDPRESS_DB_USER and WORDPRESS_DB_PASSWORD environment used in Docker compose file.
Username: wordpress
Password: wordpress
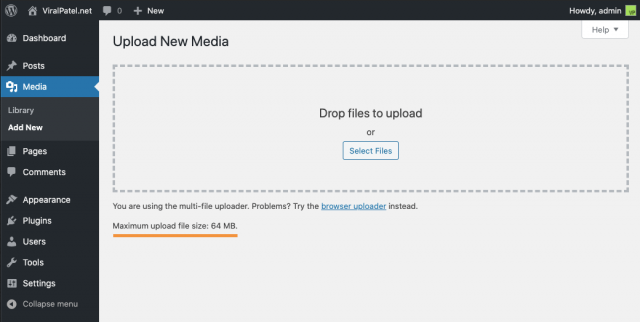
If you are trying to import settings from existing WordPress site once you start your local WordPress docker container, you will realise the default max upload size is 2mb.
To increase the upload file size, we can specify custom php.ini file (in our case upload.ini) and setup the Docker compose file to copy it within container.
Create file upload.ini in the same folder as docker-compose.yml
$ touch upload.iniAdd following in upload.ini to change the upload_max_filesize.
upload.ini
file_uploads = On memory_limit = 64M upload_max_filesize = 64M post_max_size = 64M max_execution_time = 600Update the docker-compose.yml file and mount the local upload.ini file.
wordpress: depends_on: - db image: wordpress restart: always volumes: - ./:/var/www/html/wp-content - ./upload.ini:/usr/local/etc/php/conf.d/uploads.ini environment: WORDPRESS_DB_HOST: db:3306 WORDPRESS_DB_USER: wordpress WORDPRESS_DB_PASSWORD: wordpress ports: - 80:80 - 443:443 networks: - wpRestart the docker container by running docker-compose up -d
Check the max image size under Media > Add New
The docker-compose.yml is available in Github for further update.
Github – source code
Happy WordPressing :-)


JSON Web Token (JWT) is an open standard defines a compact and self-contained way for securely transmitting information between parties as a JSON object. This information can be verified and trusted because it is digitally signed. JWTs can be signed using a secret (with the HMAC algorithm) or a public/private key pair using RSA or ECDSA.
Although JWTs can be encrypted to also provide secrecy between parties, we will focus on signed tokens. Signed tokens can verify the integrity of the claims contained within it, while encrypted tokens hide those claims from other parties. When tokens signs using public/private key pairs, the signature also certifies that only the party holding the private key is the one signed it.
JWT tokens consist of 3 parts separated by a period ( . ).
These parts are:
The JWT typically looks like:
aaaa.bbbb.cccccompile 'io.jsonwebtoken:jjwt-api:0.11.1'
runtime 'io.jsonwebtoken:jjwt-impl:0.11.1'
runtime 'io.jsonwebtoken:jjwt-jackson:0.11.1'<dependency>
<groupId>io.jsonwebtoken</groupId>
<artifactId>jjwt-api</artifactId>
<version>0.11.1</version>
</dependency>
<dependency>
<groupId>io.jsonwebtoken</groupId>
<artifactId>jjwt-impl</artifactId>
<version>0.11.1</version>
<scope>runtime</scope>
</dependency>
<dependency>
<groupId>io.jsonwebtoken</groupId>
<artifactId>jjwt-jackson</artifactId>
<version>0.11.1</version>
<scope>runtime</scope>
</dependency>Jwts.builder() is used to create a JWT token. We can specify claims, subject and other JWT attribute.
import io.jsonwebtoken.Jwts;

import java.time.Instant;
import java.time.temporal.ChronoUnit;
import java.util.Date;
import java.util.UUID;

//...

String jwtToken = Jwts.builder()
        .claim("name", "Jane Doe")
        .claim("email", "jane@example.com")
        .setSubject("jane")
        .setId(UUID.randomUUID().toString())
        .setIssuedAt(Date.from(now))
        .setExpiration(Date.from(now.plus(5l, ChronoUnit.MINUTES)))
        .compact();
Generated JWT Token:
eyJhbGciOiJub25lIn0.eyJuYW1lIjoiSmFuZSBEb2UiLCJlbWFpbCI6ImphbmVAZXhhbXBsZS5jb20iLCJzdWIiOiJqYW5lIiwianRpIjoiNDVmNGRiNTEtYTRlYy00YjYzLWJhMDgtNTE3MDJjYTI1MmEzIiwiaWF0IjoxNTkwNTc3NTY0LCJleHAiOjE1OTA1Nzc4NjR9.The above code to generate JWT is pretty self-explanatory however let’s check step by step how are we generating JWT token:
name and email with value Jane Doe and jane@example.com respectivelyjane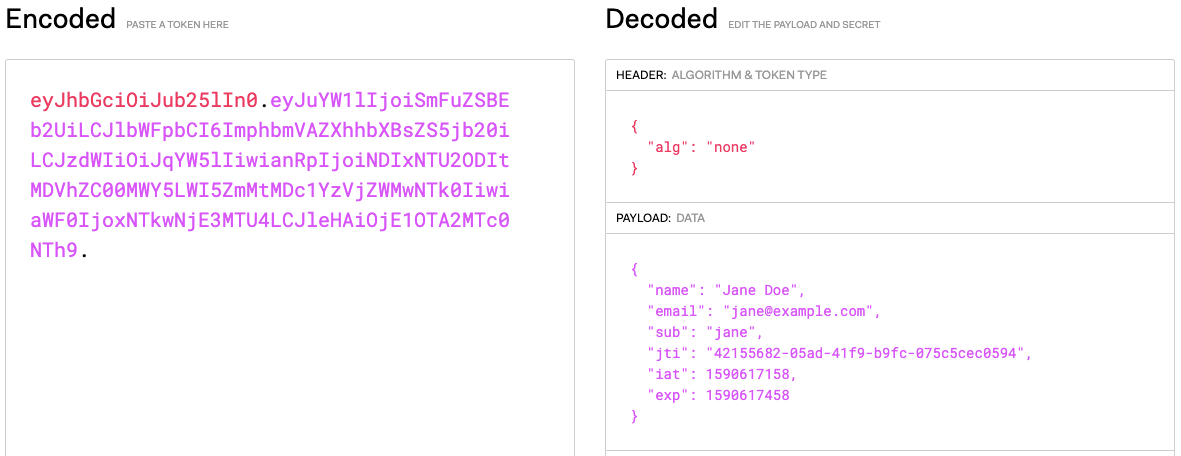
The JWT generated above is not signed (Check algorithm alg attribute in the header). We have just encoded the claims in JSON format. If using JWT for authentication or authorization it is advisable to Sign the JWT, so it can be verified.
To validate or parse the JWT token, Jwts.parserBuilder() method is used.
import io.jsonwebtoken.Jwts;
import io.jsonwebtoken.Jws;
import io.jsonwebtoken.Claims;
//...

Jws<Claims> jwt = Jwts.parserBuilder()
      .setSigningKey(...)
      .build()
      .parseClaimsJws(jwt);
While parsing the JWT token we need to pass Signing key to verify the JWT signature. Let us see how to sign the JWT token using different algorithms.
The simplest way of creating a signed JWT token is by using HMAC secret. HMAC stands for hash-based message authentication code and is cryptographic hash function. It is used to simultaneously verify both the data integrity and the authenticity of a token.
To create JWT token signed with HMAC shared secret, we need to specify signature using .signWith() method.
import io.jsonwebtoken.SignatureAlgorithm;
import javax.crypto.spec.SecretKeySpec;
import java.security.Key;
import java.util.Base64;
//...

// Key is hardcoded here for simplicity.
// Ideally this will get loaded from env configuration/secret vault
String secret = "asdfSFS34wfsdfsdfSDSD32dfsddDDerQSNCK34SOWEK5354fdgdf4";

Key hmacKey = new SecretKeySpec(Base64.getDecoder().decode(secret),
                            SignatureAlgorithm.HS256.getJcaName());

Instant now = Instant.now();
String jwtToken = Jwts.builder()
        .claim("name", "Jane Doe")
        .claim("email", "jane@example.com")
        .setSubject("jane")
        .setId(UUID.randomUUID().toString())
        .setIssuedAt(Date.from(now))
        .setExpiration(Date.from(now.plus(5l, ChronoUnit.MINUTES)))
        .signWith(hmacKey)
        .compact();
Generated JWT Token:
eyJhbGciOiJIUzI1NiJ9.eyJuYW1lIjoiSmFuZSBEb2UiLCJlbWFpbCI6ImphbmVAZXhhbXBsZS5jb20iLCJzdWIiOiJqYW5lIiwianRpIjoiYjMwMmU5NmUtODg2OS00NTJkLTg1ZjMtZGZjNDQzNTY3ZGUwIiwiaWF0IjoxNTkwNjE4NjI2LCJleHAiOjE1OTA2MTg5MjZ9.LJaar-3rnb3iuRXJBYK024l1PtEu3ay5ds24Q0bkf7wTo validate/parse the JWT token generated using HMAC shared secret, the same steps can be applied. We need to use setSigningKey() method to set the key before we parse the JWT token.
public static Jws<Claims> parseJwt(String jwtString) {
    String secret = "asdfSFS34wfsdfsdfSDSD32dfsddDDerQSNCK34SOWEK5354fdgdf4";
    Key hmacKey = new SecretKeySpec(Base64.getDecoder().decode(secret),
                                    SignatureAlgorithm.HS256.getJcaName());

    Jws<Claims> jwt = Jwts.parserBuilder()
            .setSigningKey(hmacKey)
            .build()
            .parseClaimsJws(jwtString);

    return jwt;
}
Output:
{name=Jane Doe, email=jane@example.com, sub=jane, jti=21da0729-577a-4d76-9c09-0ee11dcc2fdb, iat=1590619729, exp=1590620029}If the JWT token expires (exp claim value is less than current system time), the parseClaimsJws() method will throw SignatureException.
Exception in thread "main" io.jsonwebtoken.security.SignatureException: JWT signature does not match locally computed signature. JWT validity cannot be asserted and should not be trusted.
    at io.jsonwebtoken.impl.DefaultJwtParser.parse(DefaultJwtParser.java:411)
    at io.jsonwebtoken.impl.DefaultJwtParser.parse(DefaultJwtParser.java:541)
    at io.jsonwebtoken.impl.DefaultJwtParser.parseClaimsJws(DefaultJwtParser.java:601)
    at io.jsonwebtoken.impl.ImmutableJwtParser.parseClaimsJws(ImmutableJwtParser.java:173)
    at net.viralpatel.jwt.JWTGenerator.parseJwt(JWTGenerator.java:32)
at net.viralpatel.jwt.JWTGenerator.main(JWTGenerator.java:20)When using JWT token for microservice authentication/authorization it is advisable to sign with RSA Private/Public Keys instead of using Shared HMAC Secret. The token is generated and signed by a central authority (usually an Authorization Server) and each microservice can validate the JWT token using the Public Key exposed from Authorization Server.
Before we see how to generate JWT token with Private/Public key, let us see how to generate a Private and Public RSA Key pairs.
Generate an RSA private key, of size 2048, and output it to a file named key.pem:
$ openssl genrsa -out key.pem 2048
Generating RSA private key, 2048 bit long modulus
..........+++
..........................................................................+++
e is 65537 (0x10001)
Extract the public key from the key pair, which can be used in a certificate:
$ openssl rsa -in key.pem -outform PEM -pubout -out public.pem
writing RSA key
The key.pem file contains the private key generated using RSA and public.pem file contains public key.
Following code snippets shows how to generate JWT Token Signed using RSA.
import io.jsonwebtoken.Jwts;
import java.security.KeyFactory;
import java.security.NoSuchAlgorithmException;
import java.security.PrivateKey;
import java.security.spec.InvalidKeySpecException;
import java.security.spec.PKCS8EncodedKeySpec;
import java.time.Instant;
import java.time.temporal.ChronoUnit;
import java.util.Base64;
import java.util.Date;
import java.util.UUID;
// ...

public static String createJwtSignedHMAC() throws InvalidKeySpecException, NoSuchAlgorithmException {

    PrivateKey privateKey = getPrivateKey();

    Instant now = Instant.now();
    String jwtToken = Jwts.builder()
            .claim("name", "Jane Doe")
            .claim("email", "jane@example.com")
            .setSubject("jane")
            .setId(UUID.randomUUID().toString())
            .setIssuedAt(Date.from(now))
            .setExpiration(Date.from(now.plus(5l, ChronoUnit.MINUTES)))
            .signWith(privateKey)
            .compact();

    return jwtToken;
}

private static PrivateKey getPrivateKey() throws NoSuchAlgorithmException, InvalidKeySpecException {
    String rsaPrivateKey = "-----BEGIN PRIVATE KEY-----" +
            "MIIEvwIBADANBgkqhkiG9w0BAQEFAASCBKkwggSlAgEAAoIBAQDK7c0HtOvefMRM" +
            "s1tkdiJm+A16Df85lQlmXjQvMHNgY4P/znvl4kRON9DdBdo3K81OG7pR/0H9XvdB" +
            "TEojj/6vCVuMDeeIiBrgx0OJjhv0r8oUD4d52+1kXXITaniyZcbJ08s4sF7fUSCu" +
            "IZOhvvwQTd/tIwXGU1qqfg+bsomQ6h2czPSKXAux54vUiRO2IWf/Y6twyk8cy1PH" +
            "IOfelCVUJ4kzmP+CsOH7Rh3JMwZ0Mc4GAzndWpKwNXKjVM20/bKE9FgIiIjzmEQd" +
            "VpSdUz2MbAKM1kskdaHXQyuaHoHfPwESYuEwBld4vh9AGMF3jYMu8ggnAzVRIoWG" +
            "Mr5eCE2tAgMBAAECggEBAKBPXiKRdahMzlJ9elyRyrmnihX7Cr41k7hwAS+qSetC" +
            "kpu6RjykFCvqgjCpF+tvyf/DfdybF0mPBStrlkIj1iH29YBd16QPSZR7NkprnoAd" +
            "gzl3zyGgcRhRjfXyrajZKEJ281s0Ua5/i56kXdlwY/aJXrYabcxwOvbnIXNxhqWY" +
            "NSejZn75fcacSyvaueRO6NqxmCTBG2IO4FDc/xGzsyFKIOVYS+B4o/ktUOlU3Kbf" +
            "vwtz7U5GAh9mpFF+Dkr77Kv3i2aQUonja6is7X3JlA93dPu4JDWK8jrhgdZqY9p9" +
            "Q8odbKYUaBV8Z8CnNgz2zaNQinshzwOeGfFlsd6H7SECgYEA7ScsDCL7omoXj4lV" +
            "Mt9RkWp6wQ8WDu5M+OCDrcM1/lfyta2wf7+9hv7iDb+FwQnWO3W7eFngYUTwSw5x" +
            "YP2uvOL5qbe7YntKI4Q9gHgUd4XdRJJSIdcoY9/d1pavkYwOGk7KsUrmSeoJJ2Jg" +
            "54ypVzZlVRkcHjuwiiXKvHwj2+UCgYEA2w5YvWSujExREmue0BOXtypOPgxuolZY" +
            "pS5LnuAr4rvrZakE8I4sdYjh0yLZ6qXJHzVlxW3DhTqhcrhTLhd54YDogy2IT2ff" +
            "0GzAV0kX+nz+mRhw0/u+Yw6h0QuzH9Q04Wg3T/u/K9+rG335j/RU1Tnh7nxetfGb" +
            "EwJ1oOqcXikCgYEAqBAWmxM/mL3urH36ru6r842uKJr0WuhuDAGvz7iDzxesnSvV" +
            "5PKQ8dY3hN6xfzflZoXssUGgTc55K/e0SbP93UZNAAWA+i29QKY6n4x5lKp9QFch" +
            "dXHw4baIk8Z97Xt/kw07f6FAyijdC9ggLHf2miOmdEQzNQm/9mcJ4cFn+DECgYEA" +
            "gvOepQntNr3gsUxY0jcEOWE3COzRroZD0+tLFZ0ZXx/L5ygVZeD4PwMnTNrGvvmA" +
            "tAFt54pomdqk7Tm3sBQkrmQrm0+67w0/xQ9eJE/z37CdWtQ7jt4twHXc0mVWHa70" +
            "NdPhTRVIAWhil7rFWANOO3Gw2KrMy6O1erW7sAjQlZECgYBmjXWzgasT7JcHrP72" +
            "fqrEx4cg/jQFNlqODNb515tfXSBBoAFiaxWJK3Uh/60/I6cFL/Qoner4trNDWSNo" +
            "YENBqXLZnWGfIo0vAIgniJ6OD67+1hEQtbenhSfeE8Hou2BnFOTajUxmYgGm3+hx" +
            "h8TPOvfHATdiwIm7Qu76gHhpzQ==" +
            "-----END PRIVATE KEY-----";

    rsaPrivateKey = rsaPrivateKey.replace("-----BEGIN PRIVATE KEY-----", "");
    rsaPrivateKey = rsaPrivateKey.replace("-----END PRIVATE KEY-----", "");

    PKCS8EncodedKeySpec keySpec = new PKCS8EncodedKeySpec(Base64.getDecoder().decode(rsaPrivateKey));
    KeyFactory kf = KeyFactory.getInstance("RSA");
    PrivateKey privKey = kf.generatePrivate(keySpec);
    return privKey;
}
Generated JWT Token:
eyJhbGciOiJSUzI1NiJ9.eyJuYW1lIjoiSmFuZSBEb2UiLCJlbWFpbCI6ImphbmVAZXhhbXBsZS5jb20iLCJzdWIiOiJqYW5lIiwianRpIjoiNGJiMDU4YzUtZDZhNi00NGNiLWEwOWYtZmM5MjdiNjcwYTJiIiwiaWF0IjoxNTkwODA1NDM3LCJleHAiOjE1OTA4MDU3Mzd9.HZa6ckOvT73KqmYluW5vww10ESNGKRrcYumDjE6ESctrIkLyXrc_fasjDfMAit5SPgIWv8u2GO2XsZzFhyL1Ar_VfCMGY1m6-2Aq-clci0jfzk-q1_SBB57fBQE6io9lPuZcuGtRHjsSmwUUFwHA_bcvVU1Ka85UnQnYilgPoE0BQG9v1ZJy_hjPSisfQh56flHMqs-W4P3X6zY4Ak_92A8FHaaxWABJhJCY1Hl7OR2kSnbqcJaPRYI064x-p1gIePScPTjuDRjNOoyaA-5QEgvWV2BTW6lWIS9yE6NdzvmOt2Nv_5YN5ESuQcVT6XgxNwscoQu3iG3UiOthU6kz-wFor simplicity the Private Key is hard coded in above example. However, in real production system it will be loaded from environment variable, or a secret vault (Hashicorp Vault or AWS Parameter Store).
In above example the method getPrivateKey() gets the java.security.PrivateKey which is then used in Jwts.builder to sign the JWT token using Private key.
Next, let us validate and parse the JWT signed using RSA. For that we will need Public Key instance in java.security.PublicKey format which Jwts.parserBuilder will use to validate the JWT.
import io.jsonwebtoken.Claims;
import io.jsonwebtoken.Jws;
import io.jsonwebtoken.Jwts;

import java.security.KeyFactory;
import java.security.NoSuchAlgorithmException;
import java.security.PublicKey;
import java.security.spec.InvalidKeySpecException;
import java.security.spec.X509EncodedKeySpec;
import java.util.Base64;
//..

public static Jws<Claims> parseJwt(String jwtString) throws InvalidKeySpecException, NoSuchAlgorithmException {

    PublicKey publicKey = getPublicKey();

    Jws<Claims> jwt = Jwts.parserBuilder()
            .setSigningKey(publicKey)
            .build()
            .parseClaimsJws(jwtString);

    return jwt;
}

private static PublicKey getPublicKey() throws NoSuchAlgorithmException, InvalidKeySpecException {
    String rsaPublicKey = "-----BEGIN PUBLIC KEY-----" +
            "MIIBIjANBgkqhkiG9w0BAQEFAAOCAQ8AMIIBCgKCAQEAyu3NB7Tr3nzETLNbZHYi" +
            "ZvgNeg3/OZUJZl40LzBzYGOD/8575eJETjfQ3QXaNyvNThu6Uf9B/V73QUxKI4/+" +
            "rwlbjA3niIga4MdDiY4b9K/KFA+HedvtZF1yE2p4smXGydPLOLBe31EgriGTob78" +
            "EE3f7SMFxlNaqn4Pm7KJkOodnMz0ilwLseeL1IkTtiFn/2OrcMpPHMtTxyDn3pQl" +
            "VCeJM5j/grDh+0YdyTMGdDHOBgM53VqSsDVyo1TNtP2yhPRYCIiI85hEHVaUnVM9" +
            "jGwCjNZLJHWh10Mrmh6B3z8BEmLhMAZXeL4fQBjBd42DLvIIJwM1USKFhjK+XghN" +
            "rQIDAQAB" +
            "-----END PUBLIC KEY-----";
    rsaPublicKey = rsaPublicKey.replace("-----BEGIN PUBLIC KEY-----", "");
    rsaPublicKey = rsaPublicKey.replace("-----END PUBLIC KEY-----", "");
    X509EncodedKeySpec keySpec = new X509EncodedKeySpec(Base64.getDecoder().decode(rsaPublicKey));
    KeyFactory kf = KeyFactory.getInstance("RSA");
    PublicKey publicKey = kf.generatePublic(keySpec);
    return publicKey;
}
Output:
{name=Jane Doe, email=jane@example.com, sub=jane, jti=4bb058c5-d6a6-44cb-a09f-fc927b670a2b, iat=1590805437, exp=1590805737}In above example, we have hardcoded the Public Key. In a production system, it is usually configured through environment variable or service configuration.
Source code for the Creating and Validating JWT token in Java.
Github – source code

