Last week, my PC stopped working with a “No bootable device found” error when I powered it on. First I thought it’s a hard drive error, but when I booted from a bootable USB drive it confirmed that my Windows got corrupted. Nothing to worry, as I had my Windows DVD with me so re-installing Windows was just a few minutes process. However, my face became pale when installation process showed a completely formatted hard drive.
Usually, only the drive where Windows is installed is needed to be formatted to reinstall Windows, the rest of the data is safe. However, it seemed I accidentally formatted the whole hard drive while trying to fix the false hard drive error.
I had some important pictures and videos that weren’t backed up anywhere. So I went on a spree to find a way to recover my lost data and stumbled upon EaseUS Data Recovery Wizard. With just two clicks, the tool listed all my data in my lost partitions and I recovered what I needed in just a few minutes.
After this pleasing experience with EaseUS Data Recovery Wizard, I thought it’s worth a mention at Gtricks as well. And interestingly, a bit of talk with EaseUS team also netted an exclusive 35% discount on EaseUS Data Recovery Professional version for the Gtricks readers (link at the end).
Let’s learn what is EaseUS Data Recovery Wizard and how you can use it to recover deleted data.
Introducing EaseUS Data Recovery Wizard
EaseUS Data Recovery Wizard lets you recover deleted data from almost any type of storage device, whether it’s your PC, camera, phone, USB, or SD card. Whether you accidentally deleted a file or your storage device got corrupted/formatted, the tool will be able to recover data if it hasn’t been overwritten. On top of that, it also supports the recovery of over 1000 file types, so there is a good chance your file type will be recovered.
The free version allows you to recover data up to 2GB. If you need to recover data bigger than 2GB, then you’ll have to buy the EaseUS Data Recovery Professional version that offers unlimited data recovery and full technical support.
Using EaseUS Data Recovery Wizard
Using this tool is a two-step process. Just scan your PC for deleted data and select your data to recover. However, there are many customization options that can make data recovery much simpler, so I am going to go through them as well while showing you how to use this tool.
Download and install EaseUS Data Recovery Wizard and launch the tool. First, you’ll have to select a location to recover data from. If you know the exact location, then click on the “Select Folder” option to select that folder. In case files are deleted from multiple locations, then you can select a whole drive to scan. If there is a lost partition on your hard drive, then the tool will automatically recover it while you scan one of the drives.

As I have a recently lost partition on my hard drive, the scan process took 5 mins to complete. The time may be different for you depending on scan location and recovered data size.
After the scan, you’ll see a directory panel on the left and a navigation panel on the right. If there is any lost partition on the hard drive, then it will be listed at the top to access its data.

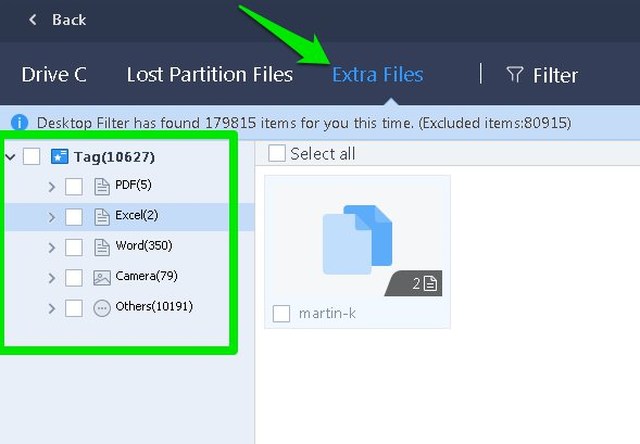
EaseUS Data Recovery Wizard may not be able to keep exact directory structure as it was deleted (didn’t keep it for me). This is where the Extra Files, Filter, and Search options will help you.
Filter: The Filter option will let you only open directories containing a specific type of files. This includes videos, graphics, documents, recycle bin, and more.

Extra Files: This section only contains raw files, such as images, videos, and documents, etc. You won’t have to navigate any directories, just select file type from the left panel and all files of that type will be shown.

Search: The Search feature is the most powerful that lets you enter the name of the file to quickly see all the files matching that name. A very handy feature if you need to recover a specific file.

For the demonstration, I will be recovering files from the lost partition. In the below screenshot, you can see all the data that was deleted from hard drive due to Windows corruption. To recover data, check the checkbox next to the file or folder (multiple can be selected) and click on “Recover”. You will then be prompted to select a location to save the recovered file and the recovered data will be saved there.

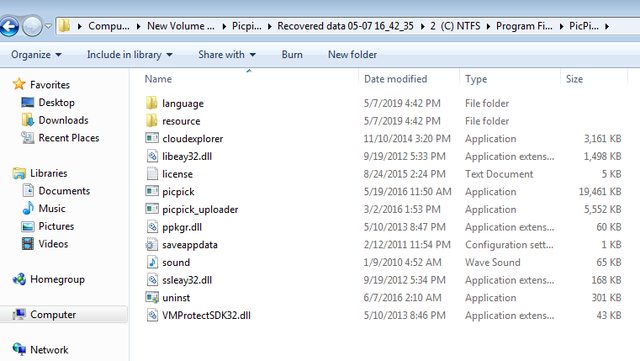
In the below screenshot, you can see all the files that EaseUS Data Recovery Wizard has recovered.

Ending thoughts
EaseUS Data Recovery Wizard worked perfectly for me and recovered all the data I needed. Although I did notice some of the data missing, I guess it got overwritten as I filled up the hard drive almost 40% again with new data. You should avoid adding more data to the hard drive if you need to recover data, as new data may overwrite the data you want to recover.
If you like EaseUS Data Recovery Wizard and would be interested in buying the unlimited data recovery version, then you can get it from the below link at an exclusive price of $44.97 (actual price $69.95).
EaseUS Data Recovery Professional
The post Recover Your Lost Data From Any Device With EaseUS Data Recovery Wizard appeared first on Gtricks.
via Gtricks http://bit.ly/2J7Wm6i
No comments:
Post a Comment
If you have any question please let me know